
In this technique I am going to show you how to create a very easy background and then apply a simple Mum flower over the top of the first color. The product that we are using in the technique is a Glaze that is used for Design work. This glaze does not move when fired, and also the color stays very vibrant. This product is also very easy to use. The products that I prefer to use is Hobby Colorobbia Bellissimo Design Glaze.
Step 1. First step in this project is to create the background. Create the stripes by applying 1 inch painters tape to the area. Space out the tape so you have nice even, straight lines.
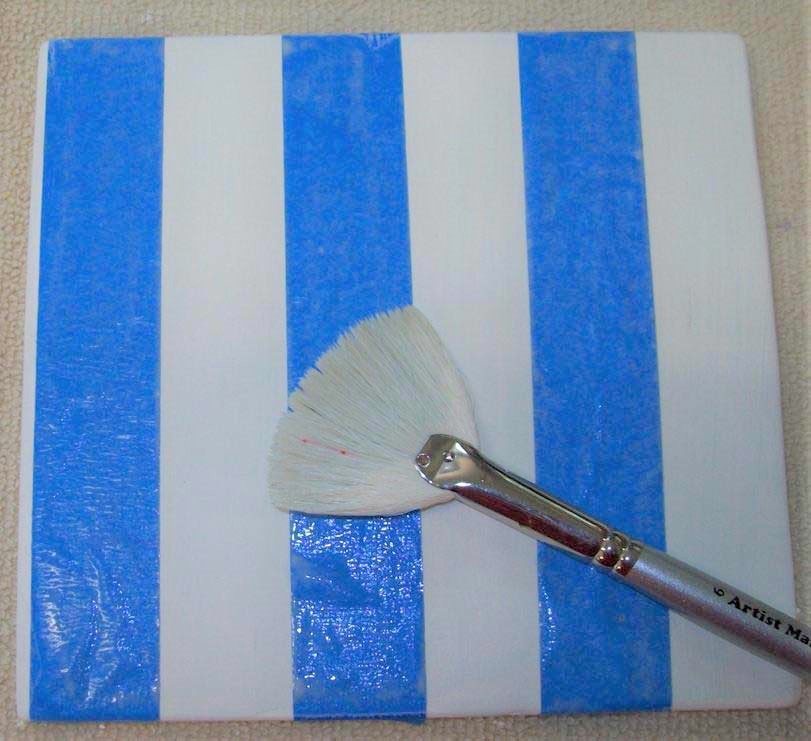
Step 2. Using #6 Soft Goat Fan Brush and 942 Green Tea, apply 3 coats of the Green Tea to the stripes. When applying the first coat, have a small amount of water in the brush. Mix this water into the color before picking up the color to apply to the tile.
Apply 1 coat and then let the color dry before applying the second coat. Let dry for about 10 minutes or so. Now apply the next two coats but be sure to let each coat dry for at least 10 to 20 minutes before applying the next coat. After you apply the last coat, let the coat dry completely before you go on to the next step. If you don’t let this base color dry completely, it will mix with the flower color and you will have a terrible mess. Before the color is completely dry, remove the tape. If you remove the tape at this time it won’t pull of the edge color. Now let dry completely.
Step 3. Using a water color marker you can apply some guide lines for your flower. I do this so that I can get my spacing of the petals arranged the way I want them. If you use a water color marker it will fire away when you fire the glaze. There would be no need to erase them.
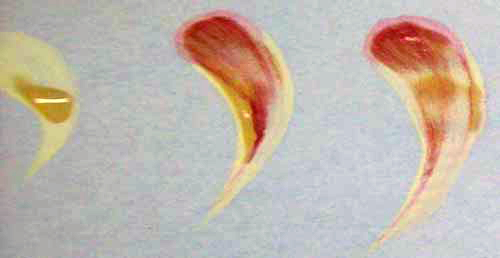
Step 4. Using the #6 Round, and 904 Strawberry Fields, make Comma Strokes that start at the outside edge of the petal and pull back to the center. The red commas will be the back petals of the flower.
Apply 1 coat to the petals, let dry for a few minutes, now go back and apply a second coat.
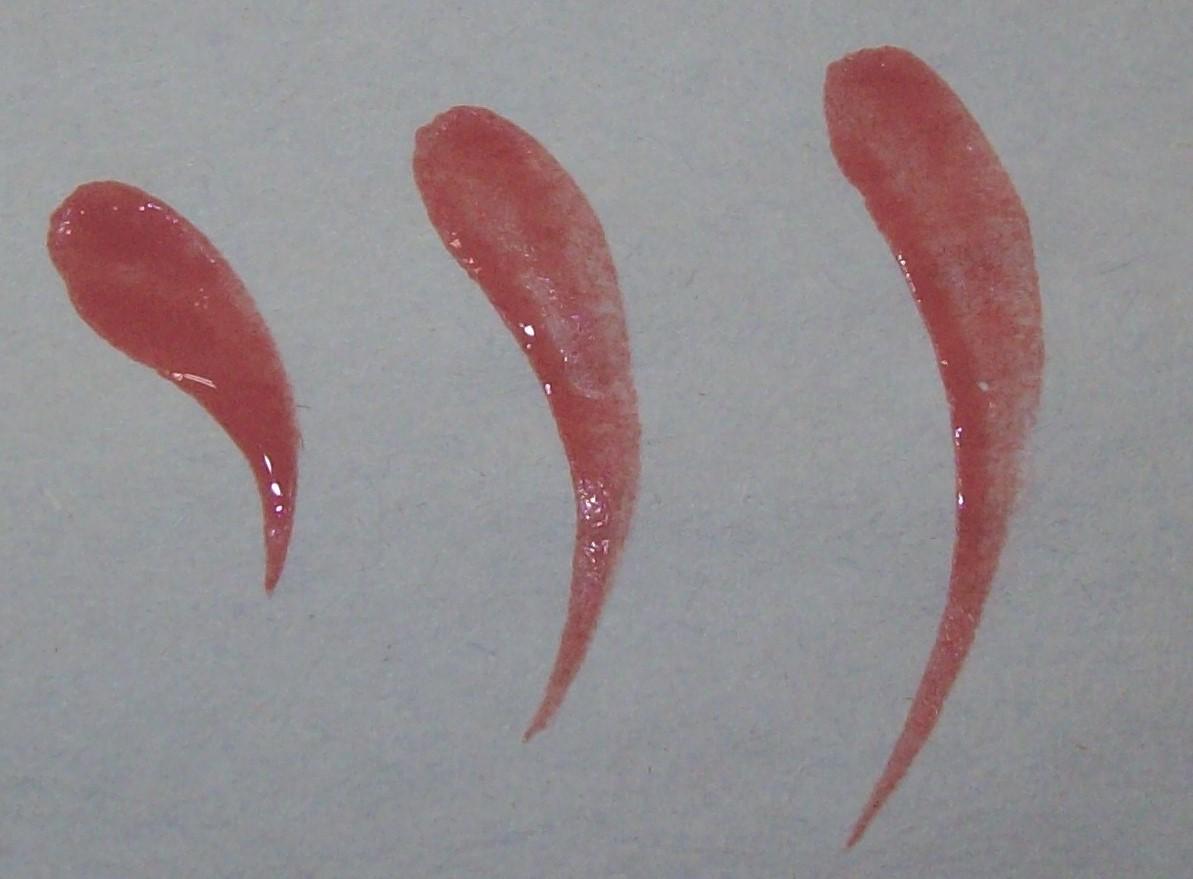
Step 5. Here is how to make a Comma Stroke: Load the brush with color, lay it down, now flatten it out, pull it toward you, and as you pull it, bring it up to a tip. It is called Press, Pull, and Lift. In the first picture up above you can see how that works. The second picture is the Red is applied to flower area.
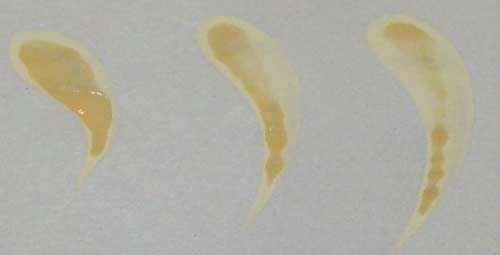
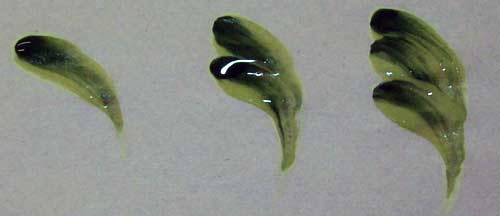
Step 6. After applying the second coat of Red to the flower and it completely drying, now you can apply the second set of petals. Using the #6 Synthetic Sable Round. and 902 Apricot Stone, apply the next layers of the Comma Strokes. These would be the next set of commas that are in the middle section of the flower. Apply the strokes the same as you did the first layer.
Apply 1 coat, let set for a while to dry. The second coat you will apply will be the same stroke but the brush will be loaded a little different. Load with the Apricot Stone, now the tip the brush with 904 Strawberry Fields. Now stroke right over the strokes you just applied. When I instruct people to do this type of brush stroke, I refer to tip the toes of the brush. Let dry completely.
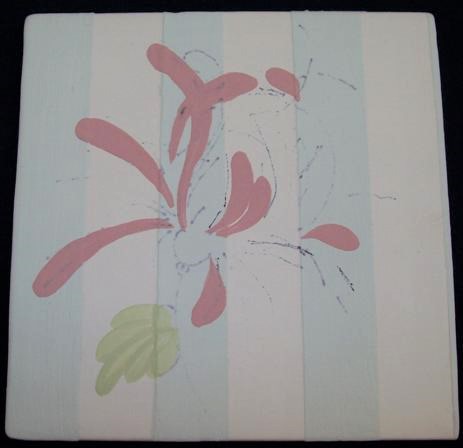
Step 7. The last set of strokes are for the petals that are out on the top of the flower. Using #6 Rd and 901 Sunny Tuscany. Stroke in 1 coat, let dry, then the second coat is brush loaded with Sunny Tuscany, and tip the toes with 902 Apricot Stone. Stroke right over the first coat. Let dry completely. The other section of the pattern that needs to be applied is the leaf. Using the #6 Rd and 920 Limelicious, stroke in the leaf. Start at the center of the leaf, stroke in a long comma. Now to create the side sections of the leaf, start off to on side, curve in and pull to the point of the leaf. Let the leaf dry, then for the second coat of the leaf, load with the Limelicious, tip the toes of the brush with 922 In the Jungle. Stroke the leaf in the same way you stroked it in the first time. Let dry.
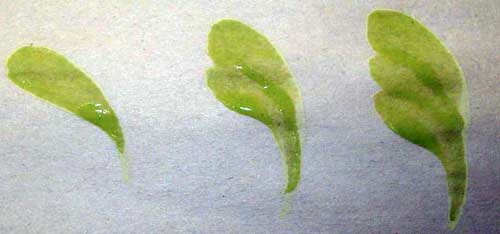
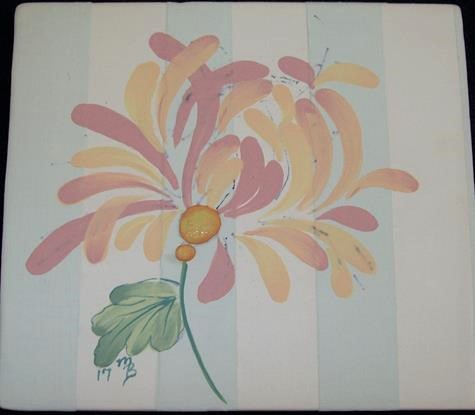
Step 8. Final touches for this piece are, apply the stem and detail to the leave using 5/0 Synthetic Sable Liner Brush and 433 Forest Spot. Have the color thinned to ink consistency, load the brush, and have the brush up on the tip toes while applying the color. This will help you make a thinner, fine line. Outline the leaf and then just draw in a stem. This just needs to be done one time.
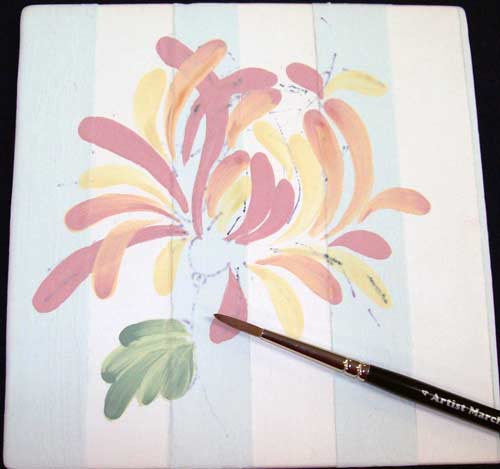
Step 9. The last step is to apply the bottom section of the flower. This is a raised area. To apply this the product, you scoop up the product, plop it in the area, and then move it a little to smooth it out.
The color used is AK09 Yellow. This product is called Appli-Kate. This is just applied one time.
Brush Stroke Mums by Marchelle Burnham
I am a Ceramic Educator that travels all over the United States. I use a large variety of Zem Brushes in all kinds of the different Mediums connected to the Fired Arts.
I love to share my knowledge of the Ceramic and Glass industry. Being able to help people get a better understanding of how they can use Zem Brushes is one of my favorite things to share with others.
Marchelle Burnham/ Back Door Ceramics
Email: bakdor@fmtc.com Facebook: Back Door Ceramics